
Giani Butcher Block Easy Epoxy Countertop Paint Kit
Original price was: $199.95.$180.45Current price is: $180.45.


Price: $199.95 - $180.45
(as of Aug 08, 2025 01:37:39 UTC – Details)
Elevate your kitchen with the Giani Butcher Block Countertop Paint Kit, a simple and cost-effective solution to transform your countertops into a stunning centerpiece. With its rich, warm tones and authentic woodgrain finish, this all-in-one kit recreates the timeless charm of real hardwood, bringing rustic elegance to any space. Designed to be applied in just three easy steps, it’s perfect for refreshing Formica®, laminate, Corian®, cultured marble, or traditional granite surfaces. Featuring a durable, high-gloss epoxy topcoat, this kit ensures long-lasting protection against daily wear and tear, making it both beautiful and practical. Whether you’re a seasoned DIYer or a first-timer, Giani makes achieving professional results effortless.
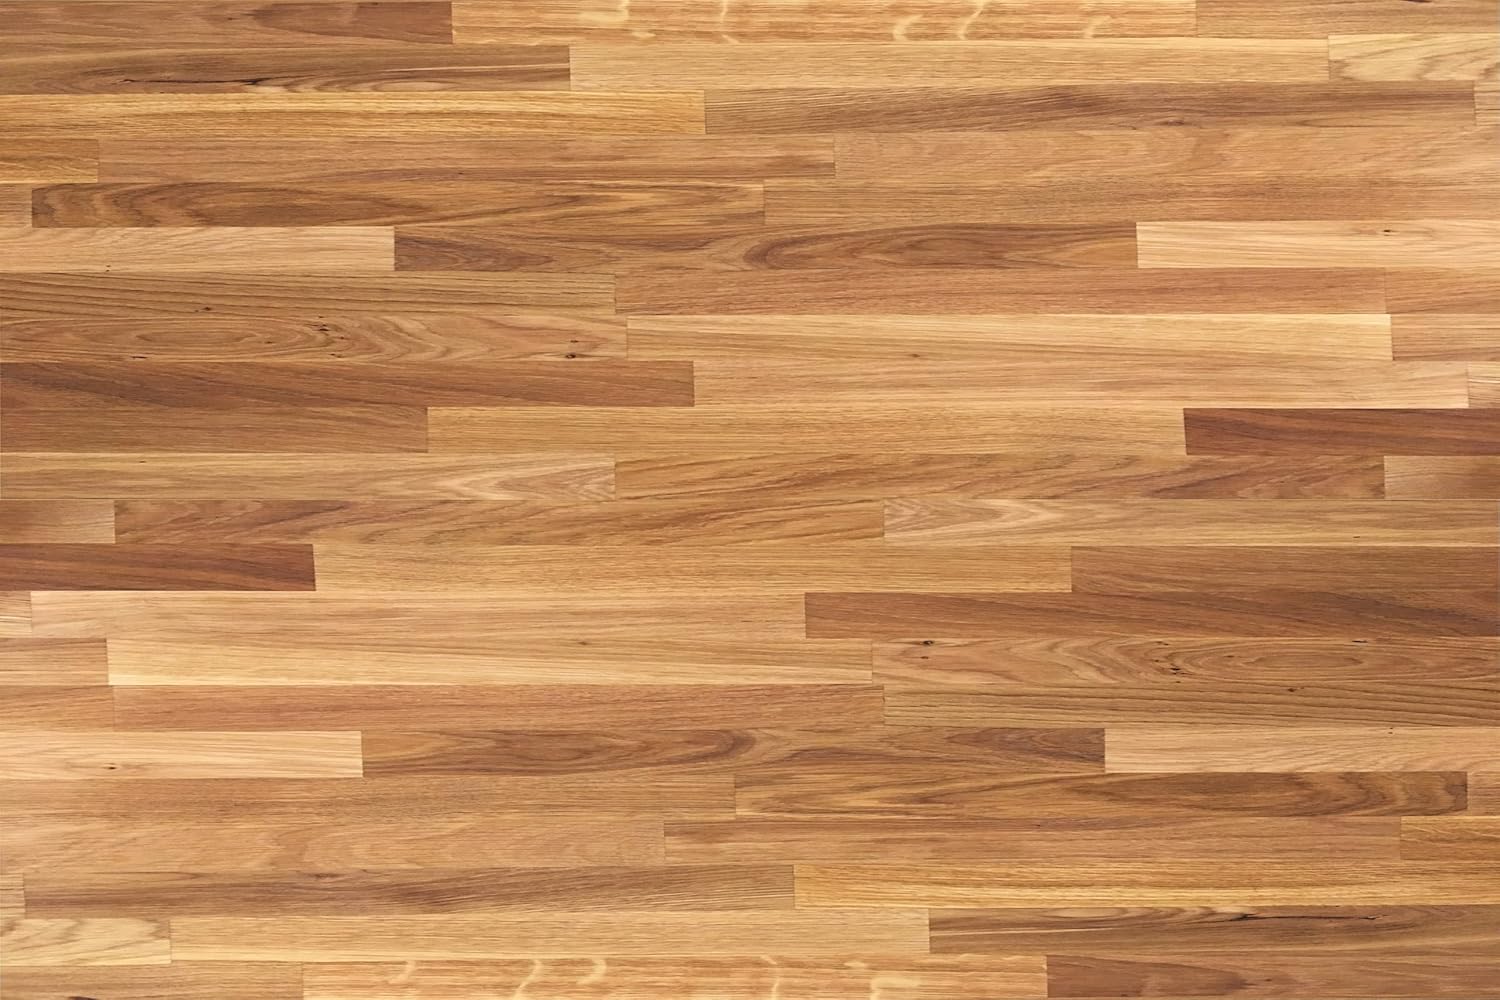
Authentic Woodgrain Finish: Transform your countertops with rich, warm tones and a realistic woodgrain design that brings the natural beauty of hardwood into your kitchen.
Three-Step DIY Application: Easy-to-follow instructions and all-inclusive tools let you achieve stunning results in a single weekend—no professional experience required.
Durable Epoxy Topcoat: Features a crystal-clear, high-gloss epoxy topcoat that protects against stains, scratches, and everyday use while maintaining a brilliant finish.
Multi-Surface Compatibility: Perfect for refreshing Formica, laminate, Corian, butcher block, cultured marble, and traditional granite countertops.
Low Odor & Zero VOC: Safe for indoor use, with a low-odor and zero VOC formula that ensures a worry-free and environmentally friendly project.
Covers 35 Square Feet: Each kit is designed to cover the average kitchen countertop area, making it ideal for most home renovation projects.
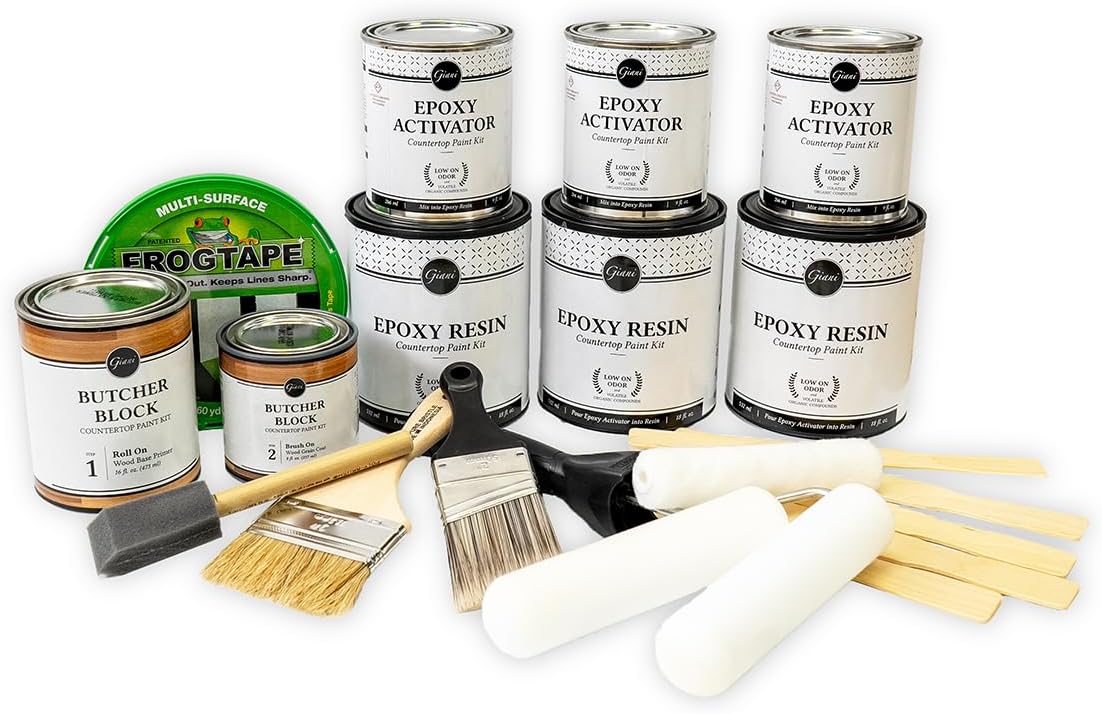
All-in-One Kit Includes Tools: Comes with a base primer, wood grain coat, epoxy activator and resin, brushes, rollers, drop cloths, gloves, and more—everything you need for a flawless finish.
Customers say
Customers find the epoxy paint kit easy to use, with clear directions and straightforward application of primer and epoxy, resulting in beautiful countertops that look like new. Moreover, the product offers great value as an affordable alternative to replacing countertops, and customers consider it a game-changer for kitchen renovation. However, the durability receives mixed feedback, with some praising the finish while others find it not durable. Additionally, the application process is time-consuming and requires patience, and several customers report issues with bubbles in the clear coat that are difficult to remove.
9 reviews for Giani Butcher Block Easy Epoxy Countertop Paint Kit
Add a review
Related Products


Original price was: $199.95.$180.45Current price is: $180.45.

Chyloe Bean –
Great Inveatment
Transformed My Kitchen â Gorgeous Results!I canât say enough good things about this epoxy countertop kit! I was a little nervous going into this project, but the instructions were super clear, and the process was surprisingly beginner-friendly. Once everything cured, I was blown away by how professional and high-end it lookedâsmooth, glossy, and absolutely stunning. It completely transformed my kitchen on a budget.The mix was easy to work with, it leveled out beautifully, and the finish looks like something straight out of a showroom. Itâs also held up great so farâno peeling, no bubbles, and super easy to clean.If youâre on the fence, go for it! Just take your time prepping, follow the steps closely, and youâll be amazed at the results. Iâve already gotten so many compliments!
Michelle –
Absolutely Amazing!!
Kit comes with everything you need, except tape, tweezers, sos pads and a few minor things. I watched the videos prior plus I just started making resin crafts so I was familiar with resin. The directions provided were clear and included everything plus more that you need to know.A little back story on why we decided to do this. We bought this house a few years ago and the people that flipped this house ( not knocking flippers because there are great ones out there!) but they did a horrible job. Anything to cut corners is what they did. Iâm a DIYer of heart so I saw the potential in the âbonesâ of the house. They installed slabs of granite, cut not filled in properly to connect etc. It also started darkening over the years. We installed under cabinet led lighting after using those magnetic lights and having to recharge ALL the time. Well we got this great under cabinet lighting that you plug in and it was a game changer. Truly made me see why I didnât like the granite. And we recently installed lvp flooring from dark flooring so everything was coming together except now the countertops. It wasnât in the budget to buy new so I had my eye on this kit. Merry Christmas to me because it was everything I wanted and more. Really brightened my kitchen! If you follow the directions to a T you canât go wrong. The only thing I would say to watch for is definitely the drips, put the plastic tarps down and the drips under the counter. Also our countertops probably arenât ð¯ level, so look at the edges and make sure it is leveling to the edge. I have a few spots that didnât and I will try to fix them, most likely sanding the area, and putting a little resin on it. But overall it really looks like I spent good money to have these professionally done! I will probably get people asking me to do theirs lol. Giani you really did well with this kit! They thought of everything. Donât wait, just do it!! You will be so glad you did!
Emily –
Questions answered
I spent so much time looking through reviews for answers. Here are the things I never got answered but figured out, as well as what I found most important for installation.Configuration: I wanted the light counters to brighten my kitchen but have more brown hues than gray and almond colored appliances. I, with fear and trembling, bought a sample sized brown satin paint to use to tint the base a little less stark white as well as to add to the veins. It turned out gorgeous! Very happy I could tweak to make it fit what I wanted.Setup: easy peasy. I did have two seams in my Formica countertop that never quite aligned. I used wood filler and a sander to make them level. The point of no return occurred when I sanded off the design. Think I maybe could have gotten away with not doing it because of the self leveling but glad I did the extra prep. No question.Primer: Coat one did look cruddy. Coat two was much better. I had spots that really could have used a coat three but I just decided to put veins there instead to hide it. Yes, Iâm a corner cutter. (As are you if you are considering getting this instead of real marble. *wink.Veins: Less is more! It takes surprisingly little paint. Do draw out a basic plan. Do use all vein styles shown in the video/instructions from the manufacturer. I found that sometimes it helped to spray and area first before applying paint so I could shadow it better. I used two colors, the grey with just the brown ever once in awhile. I intentionally used one brush for both colors. Mix it! Sometimes I liked going over the same line several times with several squiggle variations before blending. My squirt bottle would leak and drip big drops every once in awhile. Just notice and go back to blot to work it in. The sponge white on the top was a nice touch. Make sure to leave white gaps! Itâs okay to have an empty spot once in awhile.Epoxy: I was terrified. There are so many exact rules and they are for your sanityâs safety! No one wants a bad result! I think the top three biggest things to note: 1) Thicker is better. Donât be stingy. If there is extra let it drip over the side. You just do not want to be short. A good thick coat is your friend. 2) channel your inner chill. This is not rolling on like the paint. It is pushing around. Imagine a tub of whipped cream you push around to smooth over a pie. Donât smash. More rolling creates bubbles. I also used someone elseâs tip to run over everything with a microfiber cloth first. I even used some painters tape to clean off the roller before I used it, just in case. I donât cut ALL the corners you know.Clean up: You take down the plastic and tape while it is still really wet so it doesnât get hardened in. Just wear gloves. It gets everywhere and it will get on your hands.Drying: I turned off fans and even the HVAC wasnât allowed to pump nothing through the house, but of course there was a stinkin moth 1/2 hour after the âdonât touch it, even with tweezersâ stage. It landed right in the middle of the peninsula and shed a lot of moth dust into the epoxy and it fluttered trying to escape. Plucked it out anyway because I rather have a diver than an epoxy moth display in the center of my kitchen.Will fix when I do it in a few days to the bathroom sink. What else can I marvelous? I LOVE this stuff! 5 stars! (Only one star for the moth. I know he died but let his family and friends only speak well of the dead. I thought it was a jerk move. ð
Kindle Customer –
Surprised finish,looks great.
So glad I purchased this, the countertop look great and the money I saved is amazing. Thanks very easy to use, I watch all the videos I could and they were helpful in preparing me to do the job. The only issue I had was the bubbles that appeared after the it seem almost dry – I check for bubbles throughout the application of the epoxy but I did get several bubbles hours later. They are hardly noticeable but I know where to look. I would definitely use the product again, maybe the bathroom vanity next.
brittny blain –
Firstly I want to acknowledge their customer service. It’s beyond amazing! I’ve reached out several times asking questions and they always respond in a timely manner answer any and all questions! If you’re looking at epoxy for a countertop for a cheaper but beautiful alternative to marble I would def recommend Giani!!! Their epoxy is easier to use than the craft epoxy you get! The smell is very mininimal! If you use this epoxy there’s some CRUCIAL steps you need to take. When you are mixing resin and activator make sure you get all the activator out, when you stir, DESPITE THE INFO VIDEO SAYING to stir quickly, DO NOT or you will get bubbles!! Stir SLOW AND Steady, making sure you get the bottom and stir for 3 min 30 sec. Do not bring your stir stick in and out of the epoxy or you introduce air bubbles! Before you use your FOAM roller to spread take some painters tape and wrap it around it and remove instantly and it’ll remove all lint. The video says to let the epoxy pour over the sides to coat it. I found if I poured too much over the sides it rippled it. Just guide it to the side and let it drop a bit and then roll over it with a roller. Also if you let a ton pour over the sides the underneath will drip for hours pooling.MAKE SURE YOU HAVE A FLASHLIGHT after you pour each section and get down to counter level to make sure that it’s even and that ALL SPOTS are covered because you can’t tell unless light is hitting it. This step will save you alot of hassle after. If you get lint or animal hair that lands in it take a tooth pick or exact and carefully pick it out, I did this for up to 45 min after and it leveled back out. Make sure you’re dedicating a few hours after you pour to coming back and either taking your brush (that you’ve wrapped so it doesn’t dry) or even a clean stir stick and run it underneath the ledge of your counter. It continued to drip for a few hours afterwards and I had to do this around 5 times… You can tell when the epoxy is getting to the point of not being able to do this step as it’ll start to string when you’re scraping. If it does do not panic! I just lightly smoothed out the drip and then cleaned my exact with rubbing alcohol and smoothed it back out. Do not attempt to keep scraping drips after this point, this is the time you have to leave it be!! ALCOHOL IS GOING TO BE YOUR BEST FRIEND throughout this project as it’s the only thing that will remove any residue or stickiness from anything. I hope this helps! Don’t let all this deter you it’s really quite easy if you follow these tips!! It looks gorgeous!! I would absolutely recommend their YouTube video to learn everything else as well as how to vein the faux marble parts!!
chris –
The kit worked well and was easy to use. We had one of the activator cans leak during shipping, but were able to contact Giani directly and they sent us a replacement for free. Definitely make sure to be extra careful around the epoxy while it is curing. Our house was pretty dusty and we noticed some dust embedded in the epoxy in the morning. While the epoxy seems pretty resilient, some heavier items leave small indents even once the epoxy has cured for 2+ weeks.
Amazon Customer –
I was nervous about trying this product, but it was so easy to use and the results were great. We poured the epoxy just before we were leaving for a few days, I imagine it would be difficult to avoid putting anything on the countertops until it was cured if we were home. The finish on the flat surface of our countertops is beautiful, the raised back edge of the laminate is not as smooth, but still looks so much better than it did before the glow up. I don’t know if it will discolour or have any problems over time, but we are very happy with it right now.
Randa –
My epoxy is still curing so Iâll update as time goes on.I used Giani before years ago and knew it was a quality product so I wanted to try the marble to cover my dateâs blue/grey laminate.The process is easy. Iâm not artsy so if I can do it, anyone can.My only issue was veining. I originally wanted a minimal look but kept filling in the sparse parts and didnât get the look I originally intended. So be mindful and just put down the brush.Overall it looks great. We plan on replacing the countertops in a year, so I had nothing to lose.Big improvement. Kitchen is brighter. I just hope the massive shine stays. You can see the trees outside mirrored in my countertop and I love it.Iâll work on an Instagram reel for a video – @randanutrition to see it (it will be about a week before I get to it).I used one kit for this. I ordered two, and I have nothing opened for the other kit, but Amazon wonât accept returns so keep that in mind. I feel like I wasted $200+ on the one kit.
G –
I bought this over a year ago, and after reading the instructions put it in the closet until I had the courage and multiple days off to tackle this project. Pro tips: you will need to make sure all pets and humans (especially small ones) stay out of the kitchen for at least 3 days. Read the instructions and watch the videos thoroughly, and pay special attention to the epoxy mixing part. If you do that incorrectly, it won’t cure and you’ll have a really sticky situation on your hands.Although it was time consuming, I am so happy with the result! It is not perfect, there are a few spots where dust was trapped in the epoxy while curing, but I can live with that. Despite what the instructions imply, I think it is impossible to remove every piece of dust that lands while it is curing, and after about an hour you are going to leave marks with your tweezers if you try to do so. So, if you are looking for perfection, you’re not going to get it with this. I also didn’t really follow the veining instructions, I made a few larger, subtle ones instead of small ones all over the place. Overall, this is great if you’re looking for a cheap solution to make your old laminate counters look a bit nicer for a few years until they can be replaced (I paid $230 for this kit, now it is listed for almost $400, not sure I would have paid that). But I don’t expect that they will keep their shiny glory for more than a few years. Time will tell.