
Odorless Bathtub Refinishing Kit – Durable, Self-Leveling Epoxy for DIY Reglazing – Works on Porcelain, Fiberglass, Enamel, Acrylic, Cast Iron – 2.7kg – Made in the USA
$155.00


Price: $155.00
(as of Aug 07, 2025 18:30:58 UTC – Details)
Product Description


Procedure for refinishing

Old bathtub
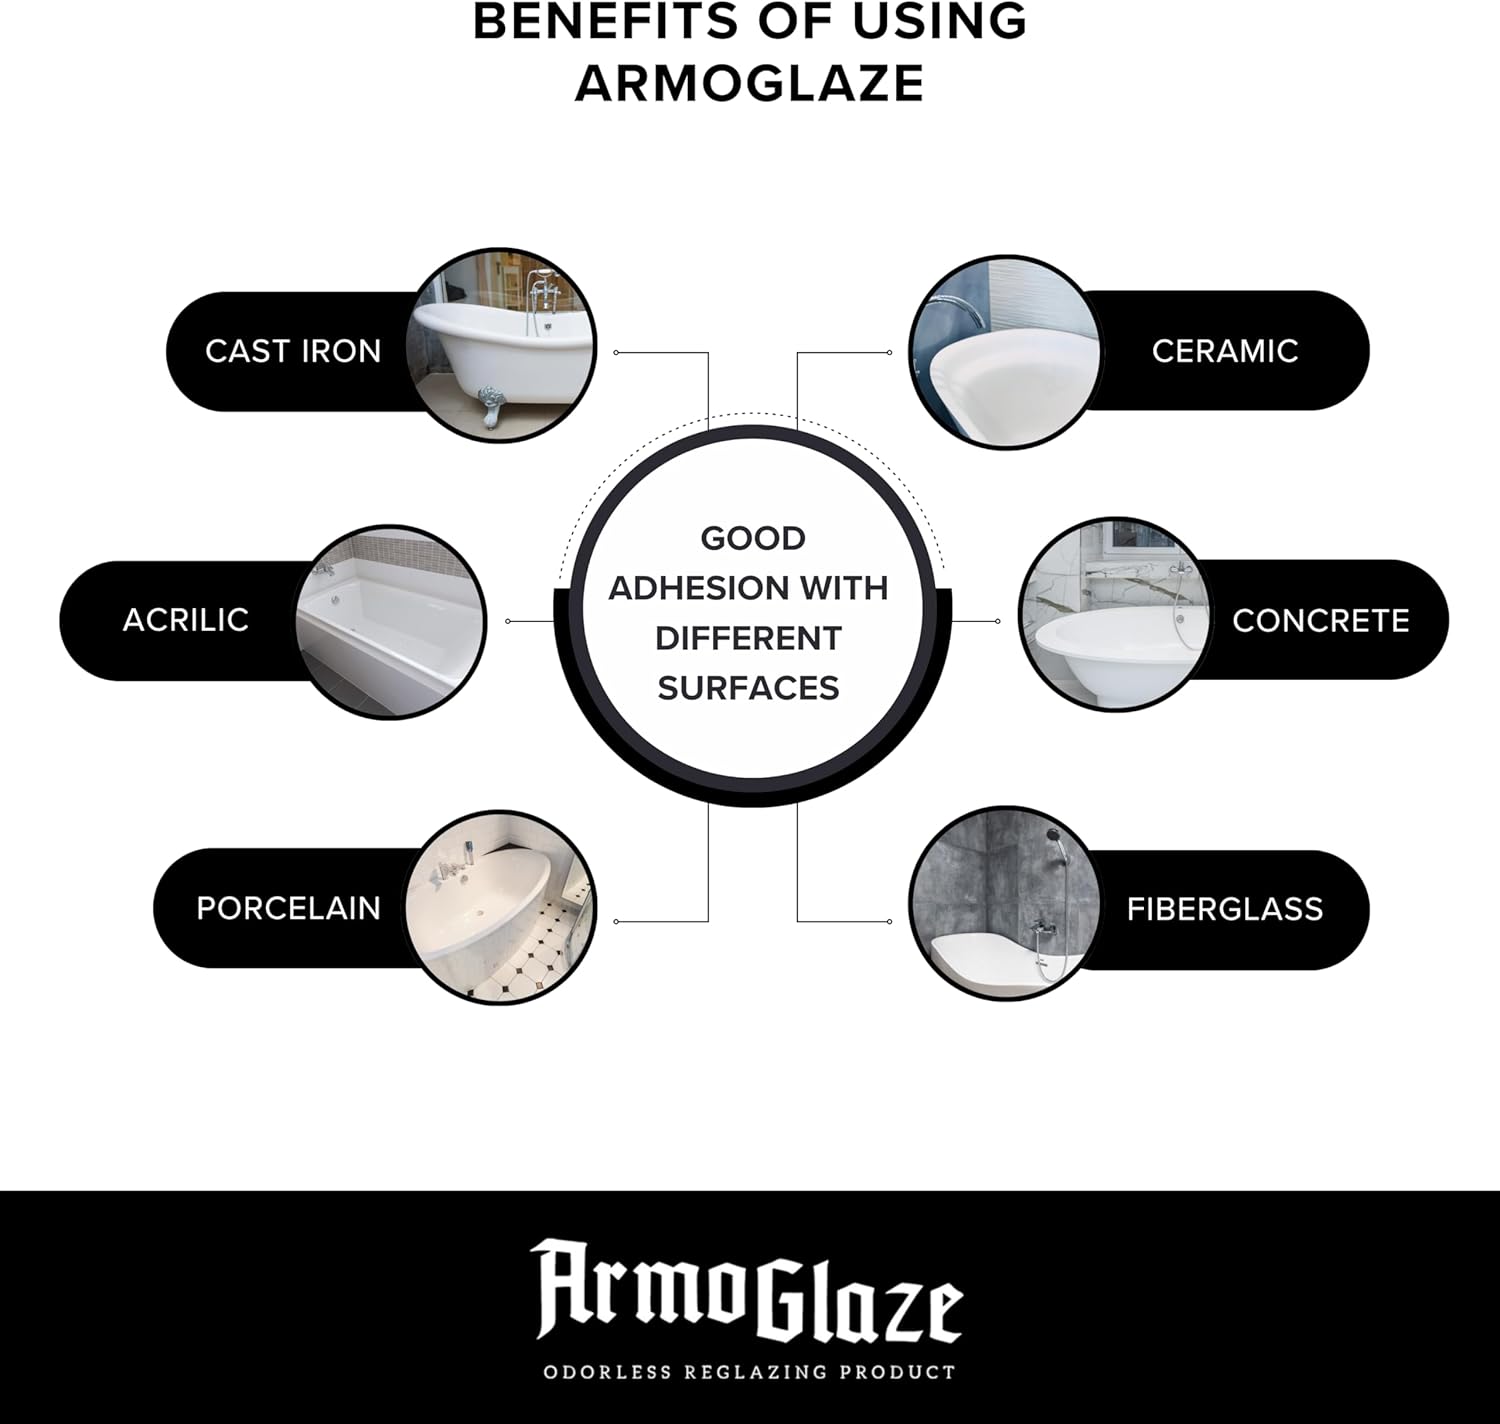
What do you need? Old bathtub and wish to renew it. ArmoGlaze has good adhesion with different surfaces.

Preparation of surface and mixing product.
In the second step watch the video and read the instructions. If you have any questions before you start the application do not hesitate calls us.
Important about Part H
Apply part H on your surface with a brush (for a plastic tub you do not need to use and apply, an H part).
Important about sandpaper.
For plastic tubs use 180-220 grip sandpaper. For all other surfaces use 80-grip sandpaper.

Application
Third step. Application.
Firstly, watch the video. No rush in the Bathtub Refinishing kit for DIYers, you have a slow hardener with enough time to improve your mistakes. If you have some problems, during the process and after the process, reach us.

Clean and wait 24 hours
Fourth step.
After the paint stop moved and took the form of hard caramel.
Remove all tape and plastic that you use for masking. Wait 24 hours. Apply new caulk. Enjoy your tub :).
Odorless and Free of VOCs for Safe Indoor Use ArmoGlaze features a non-toxic, fume-free formula containing zero VOCs, making it safe for homes with children, pets, and sensitivities. Unlike traditional spray refinishing kits, it does not release strong odors or harmful chemicals during application.
Simple DIY Application Utilizing Self-Leveling Technology. This professional-quality refinishing kit incorporates a pour-and-spread method, eliminating the need for spraying tools. The self-leveling epoxy ensures a smooth, streak-free surface with minimal effort, making it perfect for both novices and experienced users.
Versatile Compatibility With Various Surfaces Designed for refinishing bathtubs made of porcelain, fiberglass, acrylic, enamel, and cast iron. This robust coating adheres effortlessly to different materials, offering a thick, even finish that resists peeling, chipping, and fading over time.
Safe for Hot and Cold Water Without Chemical Leaching Independently evaluated for VOC safety, ArmoGlaze remains stable when exposed to hot showers and cold baths. The cured coating does not release harmful substances into water, ensuring long-term safety for daily use.
Long-Lasting Protection With a Glossy, Resilient Finish This high-performance epoxy boasts 99.83% non-volatility, meaning it will not break down, evaporate, or deteriorate over time. The thick, glossy layer withstands daily wear, stains, and moisture, delivering a professional-grade finish that endures for years.
Produced in the USA With High-Quality Materials, this bathtub reglazing kit is crafted by skilled refinishers and provides an economical solution for homeowners, hotels, and rental properties. It achieves a smooth, high-gloss finish while ensuring safety, durability, and enduring performance.
Customers say
Customers find the bathtub refinishing kit worth the time and effort, resulting in a brand new look that’s smooth as glass. The application process receives mixed feedback – while some find it easy to apply, others say it’s more difficult than the video instructions suggest. The durability is also mixed, with some finding it very durable while others report it peeling up within a month. The thickness of the product is a concern for many customers.
2 reviews for Odorless Bathtub Refinishing Kit – Durable, Self-Leveling Epoxy for DIY Reglazing – Works on Porcelain, Fiberglass, Enamel, Acrylic, Cast Iron – 2.7kg – Made in the USA
Add a review
Related Products


$155.00

Randy Dinh –
If You Can Follow Simple Instructions, You Can Achieve a Professional-Quality Finish — FoolProof!
I recently took on my first bathtub refinishing project and wasnât sure which product to use. After some research, I decided to try the Armoglaze Bathtub Refinishing Kit, and Iâm so glad I did. While the process seemed a bit daunting at first, the results were fantastic, and with the right preparation, it was surprisingly straightforward.**Preparation is Key**The most important lesson I learned is that proper preparation is crucial for success. You’ll start by thoroughly scrubbing the tub with an abrasive cleaner to remove grime and residue. If I were to do this again, Iâd use a small orbital tool (like those used for car buffing) to make the process faster and more efficient.A razor blade scraper is an absolute must-have and proved invaluable at every stage of the process. From opening the box to removing old caulk during prep, and even cleaning up after painting. The scraper made it easy to clean up those excess paint along the edges, leaving a neat and polished finish.**Painting Process**The kit comes with everything you need, and mixing the epoxy is simple. You combine a small jar of Part A directly into the bucket of Part B, creating more than enough epoxy to cover an entire tub. I actually found myself removing excess epoxy pooling by the drain. The instructions clearly mention that you might need to use the entire mixture, which I did not heed (and should have).If youâre new to this, I highly recommend watching the official Armoglaze how-to video, which demonstrates the process in under two minutes. Itâs a great way to familiarize yourself with the tools in the kit and the technique. Take some time to practice the motions beforehand, as youâll only have about 1.5 to 2 hours to apply the epoxy once itâs mixed.The epoxy spreads smoothly and evenly, and its self-leveling properties work like magic to correct minor imperfections. Just be sure to start coating from the upper areas of the tub, as the enamel will naturally flow toward the bottom.**Final Thoughts**Overall, the Armoglaze kit made my first refinishing project a success. The instructions were clear, and the product delivered a smooth, professional-looking finish. While it does take effort and patienceâespecially during the prep workâthe results are absolutely worth it.If youâre new to bathtub refinishing, I highly recommend this kit. Just heed the instructions, and donât forget to cover your tubâs spout! Learn from my mistakes, and youâre sure to love the outcome!
Frank Harrison –
Excellent Product!
I have waited to complete 50 days of testing this product before writing a review. I repaired the floor of my shower stall, a single piece acrylic unit. The floor surface area is probably only 1/3 of the surface area of a full bathtub, but I bought the full package and split the two mixing component perfectly in half, saving the other half for a boat repair job. The application was not difficult for someone accustomed to home repair. Follow all instructions exactly as laid out for the product. In my before / after photo, you can see that I had to “gut” a large section of the tub. There was a crack about 3 inches long and another crack about 1/2 inch long. When I finally decided to conduct the repair, I wasted time exploring the underside of the shower unit (it is accessible from the basement). These units are built well with a 2-3 inch base, including fiberglass mesh and strong plywood. The problem was not support, it was a thin layer separation due to poor adhesion of the finish layer on top, essentially the acrylic coating on the original shower unit had raised off the support base. As I peeled away at the crack, I found that the surface layer was 1/8th of an inch raised off the support structure, hence, a heavy step in the right location causes too much pressure and the original acrylic snapped. After gutting out all the separated acrylic surface and rounding all edges with an angle grinder and sander, I filled the entire unit with professional gold Bondo body filler according to instructions. It is important to ensure the finished, sanded surface is as smooth and level before adding the Armorglaze. If there is even a tiny ripple or a pocket, the Armorglaze product will follow the contour and the ripple or pocket or dimple will show up. I knew this and was careful, but on final inspection, I found two spots that I did not quite finish as well as I should have. However, they are so small, only I notice and they are in the corners where it as tough to access. The drain-cover process is tedious and requires a couple of hours of constant wiping and cleaning. I have worked with thin-set applications of concrete and I believe it is important to follow the instructions and make sure the finish layer you apply is 1/16 inch or less, as instructed. This thinness provides more flexibility when fully cured. Also, one issue is color. The product is pure white, my unit is off-white. However, as I was careful to do the entire bottom from a fixed line (I have a steady hand and I did this by eye, not tape) and allowed the product to drip from the cup and poor down off the wall, about one inch up from the curved side. It looks like it was made that way, almost like a two-tone finish. Honestly, with shadows and not so bright light in the shower unit, I don’t think a visitor would even notice. It would be nice if the product came with a compatible yellow dye to add by drop with a color comparison chart to alter the color to various shades of off-white. Let me know if you have any questions. Good luck! I will update this review if necessary.